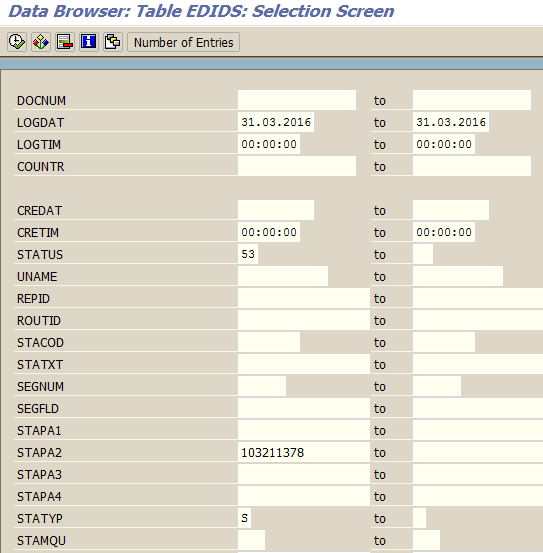
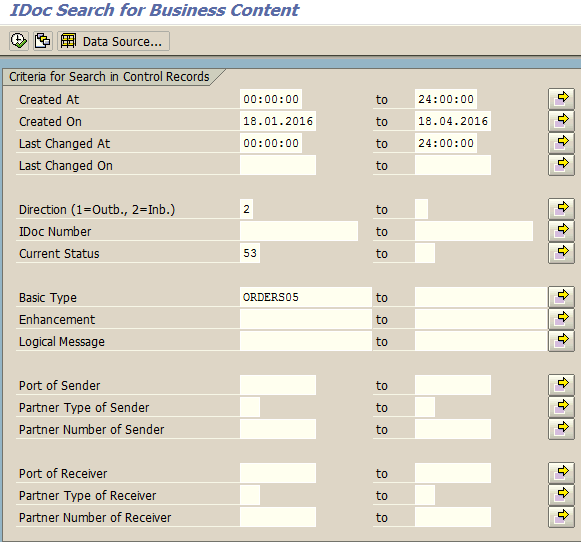
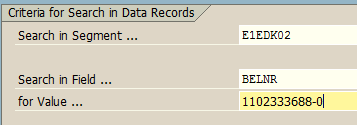
Use T code VL10BATCH and profile as 5001

Use T code VL10BATCH and profile as 5001

You may use
Function Module: CSO_P_DLVRT_GOODS_ISSUE_CREATE – auto PGI
Or Use t-code VL06O and go for scheduling operation for automatic PGI / PGR operations. set some back ground job (sm36) as per your delivery frequency
T. Codes: SM36, SM37, SM38
Background processing
You can use some of the delivery monitor components for collective background processing of large quantities of documents. To do so, enter a selection variant for the report and then schedule it for background processing.
You can also initiate background processing directly from the report’s selection screen. Enter your selection criteria and parameters and choose Program ® Output in background. You can then set the spool parameters and schedule background processing in the dialog box that appears.
Background processing triggers subsequent processing for all documents selected, but it does not issue lists. When processing is complete, a list of documents and their processing status (successful or with errors) appears in the spool.
Report WS_MONITOR_OUTB_DEL_GDSI is for goods issue posting for all documents that were selected. The actual goods issue date can be set using the appropriate field on the selection screen. You can also schedule this report as a job using Shipping >Goods issue > Collective batch processing (See also: Posting Goods issue with Collective Processing).
Report WS_MONITOR_OUTB_DEL_PICK is for creating WM transfer orders. You can specify the parameters for creating transfer orders (Select items and Adopt pick quantity) on the Control background processing section of the selection screen.
*Report WS_MONITOR_OUTB_DEL_CONF is for confirming picking orders. You can set the Adopt pick quantity parameter in the selection screen (see previous point).
*Report WS_MONITOR_OUTB_DEL_FREE is for processing individual outputs and picking outputs (such as delivery notes or picking lists). All output types specified on the selection screen that appears under Output selection are then processed for the selected deliveries. For technical reasons, this type of background processing only results in a mess
Buy Ganesha Luxmi Silver coin 999 quality in bayarea 94568
Ganesha Laxmi Genuine 999 Silver Coin quality with Hallmark.
A good gift for good wishes during Diwali , festival, house warming , return gift, birthday gift.Size of the coin 3.81 cm
https://www.amazon.com/Silver-Ganesha-Lakshmi-ships-USA/dp/B0CMH3PLZ2/
https://www.amazon.com/Silver-Ganesha-Lakshmi-ships-USA/dp/B08BK9XMFR/
<b>Availability check</b>
1. Availability check is an integral part of the business process that determines if the required delivery quantity can be met on a required delivery date. For this purpose the system takes into account pre-delivery activities such as scheduling for picking or packing times and the time taken to produce or obtain the material. It also performs several background functions such as Backorder processing, rescheduling and ATP quantities.
2. Backorder processing: processing of a sales order that has not been fully confirmed or not confirmed at a certain delivery date.
3. Rescheduling: is a proposal of how confirmed quantities already assigned to a sales order can be reassigned to other sales orders that have a higher priority.
4. Available to promise (ATP): is a process of checking the available quantities of a material. The ATP quantity consists of warehouse stock + planned receipts (incoming stock) planned issues (outgoing stock). to examine stock on hand (CO09) proceed to logistics sales & distribution sales environment availability overview.
5. Replenishment lead time (RLT): is the time taken for the material to become available either internally (in house production) or externally (from a vendor). The most important things to consider during an external procurement are purchasing and MRP2 (procurement) views of MMR where the processing time for purchasing, planned delivery time and goods receipt processing time are taken into account. On the other hand internal procurement is based on in house production time (MRP 2 view) goods receipt processing time or alternatively RLT time, which is found on MRP 3 view.
6. RLT (Replenishment Lead Time) is the time taken for the material to become available. RLT is only used when doing an ATP check (Available To Promise). The value of RLT for a material is specified on material master record.
7. There are three types of availability checks
o Check on basis of ATP quantities.
o Check against product allocation.
o Check against planning.
<b>Configuring Availability check through Checking Groups</b>
1. The checking group + checking rule determine how the availability check is to be performed.
2. The checking group determines whether and how the system checks the stock availability and generates requirements for material planning. The checking group defines what type of requirements will be passed on i.e. summarized requirements (daily/weekly) or individual requirements for each sales order.
3. The checking rule applies to how the availability check is to be carried out at the transaction level. Note that you must define checking rules for each individual application such as for production orders for example. In Sales and Distribution, the checking rule is specified internally within the system and cannot be changed.
4. The checking rule, in conjunction with the checking group, determines the scope of the availability check for every business operation; that is, which stocks, receipts and issues are to be included in the availability check and whether the check is to be carried out with or without the replenishment lead time.
5. Briefly explaining the above checking group determines which type of requirement to be passed on to MRP whether it be individual or summarized and checking rule which is at the transaction level and can be configured independently for each application module, determines which stocks, receipts and issues to be taken into account. For performing an availability check checking group has to work in conjunction with checking rule.
6. Advantages of individual processing over summarized processing
Backorder processing is possible.
You can access (MD04) order, line and schedule line individually which gives a greater control on available stock and requirements placed on stock.
The system automatically uses individual requirements in case of special stock items.
7. Required data for the Availability check to be carried out
The Availability check must be switched on at the requirement class level.
The Availability check must be set at the schedule line level.
A requirements type must exist by which the requirements class can be found.
A plant must be defined in the sales order for each schedule line item (in other words plant must be defined for every material in MMR).
A checking group must be defined in the material master record in the MRP3 screen in the availability check field.
8. Configuring Availability check and defining Checking Groups
Checking groups are introduced into the sales order based on the setting in the material master record.
SAP standard checking groups are 01 summarized requirements and 02 individual requirements or you can create your own by copying the standard ones.
Total sales and total deliveries columns are there to configure a checking rule to sum up requirements to post to MRP either individually or by day or week.
Block quantity required can be set if you want several users to be able to process the material simultaneously in different transactions without blocking each other.
The no check indicator is CHECKED when you DO NOT want the system to carry out ATP check.
9. Defining material block for other users the block check box is an indicator that enables you to block material master records of a particular material during the availability check and restrict other users from accessing same master record and reserve the material. If the block is not set, two users can confirm the same material at the same time for two different orders, not knowing if the stock is available or not. If you select this field, the material is blocked during the availability check and other users cannot: a) Make changes in the material master record. b) Create purchase orders for the material. C) Create orders for the material.
10. Defining default values for checking groups – Checking groups are introduced into the sales order based on the setting in the material master record.
However if there is no entry present in the material master record for the checking group, a default value can be set here, depending on material type and plant.
This default value will be used by the system depending on the material type mentioned in MMR and plant in sales order.
If an entry exists, this default value is over written by MMR.
11. Controlling Availability Check in this section, you tell the system what stock on hand and what inward and outward movements of stock it must take into account when performing the availability check in addition to whether or not to consider the replenishment lead time.
12. These settings are based on the checking group that is assigned to the material master record and the checking rule that is predefined and assigned to the sales and distribution transaction.
13. These settings carry out control both for sales order and delivery as well. This is due to the fact that you may want to include specific stock or incoming stock for the sales order, yet at the time of the delivery only include physical stock on hand waiting to be shipped.
14. It is possible to indicate to the system that you would like the availability check NOT TO CHECK the stock at the storage location level. This indicator is used to set the scope of the availability check.
15. It is used to switch off the check at storage location level. You create a reservation for a particular storage location. However, the scope of the availability check is set in such a way as to exclude the storage location. In this case, the system carries out the check at plant level only and does not take the storage location into account that is specified in the reservation.
16. Should you not want the system to automatically check RLT, you may indicate so here. RLT is the time taken for a material to become available. It is only used when doing an ATP check and is taken from MMR.
17. defining the elements in the availability check entirely depends on the business needs, but a few tips are given under
When controlling the Availability check at the time of the sales order, a purchase requisition does not necessarily indicate by it is going to come into the plant.
A shipping notification on the other hand – a confirmed purchase order is a good indicator of receiving stock on a specified date.
It is always recommended not to select the shipping notifications for the delivery requirements type as you may not actually receive the stock into plant or warehouse for which you are creating a delivery.
Transit time and Transportation lead time is taken from or maintained in Route
Loading time and pick/pack time comes from shipping point
You need to have clarity on backward scheduling and forward scheduling
For example you are creating a sales order today 15.02.2009 and the requested delivery date is 25.02.2009 from the customer side
Transit time is 2 Days
Transportaion planning time is 2 days
Loading time is 1 day
Pick/pack time is 1 day
Consider these settings
Now backward calculation System does a backward calculation first
25.02.2009 (requested delivery date) — 2 days (transit days) — 1 day (loading time) — 2 days (transportation planning time) = that is on 20.02.2009 there should be enough stocks in the unrestricted stocks and system checks stocks for this day or date ,that is 20.02.2009 ,whether the stock is available enough
This date 20.02.2009 becomes the material available date
Note Transportaion planning time and Pick/pack time will run parallely and the higest of these two is considered for delivery scheduling so in our case Transportaion planning time is 2 days that is the highest and hence it is taken for calculation and not pick /pack time
If the system finds enough stocks on 20.02.2009 (that means it performs a availability check for 20.02.2009 depending on OVZ9 settings) that is material available date then it confirms schedule lines for that order this is backward
Same example order is registered today 15.02.2009 and if the customer wants stocks on 17.02.2009
This means 17.02.2009-2 days (transit days)-1 day(loading time)-2 days (transportation planning time) = 12.02.2009
The order registered date is 15.02.2009and the material availablity date is past 12.02.2009 or material available date goes to past.
This is illogical
This means backward is failing here and now forward calculation takes place
Forward calculation
If you have enough stocks today 15.02.2009 + 2 days transportation planning time+ 1 day loading time+2 days transit time = 20.02.2009
This means that is on 20.02.2009 the stocks can be confirmed for this order as against a requested delivery date of 17.02.2009
In forward the system will give 2 schedule lines first that is requested delivery date that is 17.02.2009(in our case) with ZERO qty and the second date as 20.02.2009 with full qty
In backward you will find only one date in the schedule lines which is the same as requeted delivery date that is 25.02.2009 in our case
Hope i made things little bit clear to you
Transit and transporatation planning will come from route if route is maintained otherewise it is taken as 0 days
Loading and pick pack time will be maintained in shipping pt if not maintained also then it is taken as 0 days (in enterprise structure logistice execution and your shipping point details it is maintained)
Transit time and Transportation lead time is taken from or maintained in Route
Loading time and pick/pack time comes from shipping point
You need to have clarity on backward scheduling and forward scheduling
For example you are creating a sales order today 15.02.2009 and the requested delivery date is 25.02.2009 from the customer side
Transit time is 2 Days
Transportation planning time is 2 days
Loading time is 1 day
Pick/pack time is 1 day
Consider these settings
Now backward calculation System does a backward calculation first
25.02.2009 (requested delivery date) — 2 days (transit days) — 1 day (loading time) — 2 days (transportation planning time) = that is on 20.02.2009 there should be enough stocks in the unrestricted stocks and system checks stocks for this day or date ,that is 20.02.2009 ,whether the stock is available enough
This date 20.02.2009 becomes the material available date
Note Transportation planning time and Pick/pack time will run parallely and the highest of these two is considered for delivery scheduling so in our case Transportation planning time is 2 days that is the highest and hence it is taken for calculation and not pick /pack time
If the system finds enough stocks on 20.02.2009 (that means it performs a availability check for 20.02.2009 depending on OVZ9 settings) that is material available date then it confirms schedule lines for that order this is backward
Same example order is registered today 15.02.2009 and if the customer wants stocks on 17.02.2009
This means 17.02.2009-2 days (transit days)-1 day(loading time)-2 days (transportation planning time) = 12.02.2009
The order registered date is 15.02.2009and the material availablity date is past 12.02.2009 or material available date goes to past.
This is illogical
This means backward is failing here and now forward calculation takes place
Forward calculation
If you have enough stocks today 15.02.2009 + 2 days transportation planning time+ 1 day loading time+2 days transit time = 20.02.2009
This means that is on 20.02.2009 the stocks can be confirmed for this order as against a requested delivery date of 17.02.2009
In forward the system will give 2 schedule lines first that is requested delivery date that is 17.02.2009(in our case) with ZERO qty and the second date as 20.02.2009 with full qty
In backward you will find only one date in the schedule lines which is the same as requested delivery date that is 25.02.2009 in our case
Hope i made things little bit clear to you
Transit and transportation planning will come from route if route is maintained other wise it is taken as 0 days
Loading and pick pack time will be maintained in shipping point if not maintained also then it is taken as 0 days (in enterprise structure logistic execution and your shipping point details it is maintained)
SAP CMOD – Customer modifications
User Exits are implemented in such a way that unlike changes to SAP standard code, they will survive across upgrades and hot pack applications. They are also User Objects and can therefore be implemented without the need of requesting an SSCR from SAP.
Within the standard SAP programs at key points are calls to function modules starting with ‘EXIT_’. These function modules generally accept as input parameters structures containing for example the entire Order Header (VBAK) of the sales order just entered, or perhaps a table of the Order Items. These function calls are placed at points such as just before the Order is saved or just before it is printed and so on.
These function modules contain a single include statement. The name of this include is in the User domain and starts with Z. This enables it to be edited without the need for an SSCR and also prevents it being overwritten during upgrades.
Once this include has been created and activated, and the user exit is activated the User exit becomes functional.
User Exits are implemented using the transaction code ‘CMOD’. Enter this in the command line and press the Enter key. This will then show the CMOD parameter screen:

User Exits are assigned a project name which begins with Z. Having entered the relevant name in the ‘Project’ field, click the Create (or Change) button as applicable.
When you are creating a new project, the projects attribute screen will be displayed. This allows you to enter a title for the project and allows access to the Enhancements (User Exits) that you want to assign to the project and the components that you wish to use within those enhancements.
This screen allows you to enter a description of the project. Once you have done this, click the save button. You will be asked as usual to assign a development class and create a transport.
Once the transport has been created you can then go on to assign the enhancements that you wish to use to the project.
Unfortunately I have access to a 4.6C system only so therefore this description is based around that.
To find enhancements for a particular program locate the Development Class for the relevant program. Run the transaction and on the first input screen click on the Status button. This provides the program name. Another method of finding the program name is to use transaction SE93 which is the Create/Modify Transaction transaction. Enter the transaction code and click display.
In either case, cut the program name and then enter it into transaction SE38 ? the ABAP program editor. Select the ?Attributes? radio button and click display. Note the Development Class.
In 46C, go back to the CMOD main screen, enter the project name and select the ?Enhancement Assignment? radio button.
Click the change button. This will display the enhancement assignment screen. Position the cursor in the first field and press the <F4> key. This will display the Input Help personal list window, a standard window that you should be familiar with. Click the ?Information System? button and enter the development class located above into the development class field. Click the green tick.
This will display a list of enhancements for that particular development category with a short description of what they do.
Select relevant description which will be transferred back to the Enhancement Assignment screen.
For versions other than 46C, use transaction SE37 which is the Function Module editor, in the function module name field press the <F4> key and select further options. One of these will be the development class.
Clicking the enhancement button provides information on the enhancement.
The information displayed in this report includes whether the enhancement has been implemented, and is active. (Green things scattered throughout the report). Clicking the Exit name (In this case ?EXIT_SAPLV60A_002? will display the relevant function module:
To create the enhancement, double click the Include name. This then takes you into SE38 where you can edit the include to your hearts content.
Note, however, that when you try and create this include you will get a warning message displayed that the namespace you are trying to use belongs to SAP. Just click on the green tick and sail straight through.
.
User Exits in SAP FI are implemented again in a different manner to both standard user exits and user exits in SD. The user exits are available for Substitutions, Validations and Rules which are specified either in transaction OB28 (for rules), or OBBH (for substitutions).
There are 3 steps involved in setting up user exits in FI.
These are:
PROGRAM RGGBR000 .
*---------------------------------------------------------------------*
* *
* Regeln: EXIT-Formpool for Uxxx-Exits *
* *
* This formpool is used by SAP for demonstration purposes only. *
* *
* Note: If you define a new user exit, you have to enter your *
* user exit in the form routine GET_EXIT_TITLES. *
* *
*---------------------------------------------------------------------*
INCLUDE FGBBGD00. "Data types
*!!!!!!!!!!!!!!!!!!!!!!!!!!!!!!!!!!!!!!!!!!!!!!!!!!!!!!!!!!!!!!!!!!!!!*
* PLEASE INCLUDE THE FOLLOWING "TYPE-POOL" AND "TABLES" COMMANDS *
* IF THE ACCOUNTING MODULE IS INSTALLED IN YOUR SYSTEM *
*TYPE-POOLS: GB002. " TO BE INCLUDED IN
*TABLES: BKPF, " ANY SYSTEM THAT
* BSEG, " HAS 'FI' INSTALLED
* COBL,
* GLU1.
*!!!!!!!!!!!!!!!!!!!!!!!!!!!!!!!!!!!!!!!!!!!!!!!!!!!!!!!!!!!!!!!!!!!!!*
*----------------------------------------------------------------------*
* FORM GET_EXIT_TITLES *
*----------------------------------------------------------------------*
* returns name and title of all available standard-exits *
* every exit in this formpool has to be added to this form. *
* You have to specify a parameter type in order to enable the *
* code generation program to determine correctly how to *
* generate the user exit call, i.e. how many and what kind of *
* parameter(s) are used in the user exit. *
* The following parameter types exist: *
* *
* TYPE Description Usage *
* ------------------------------------------------------------ *
* C_EXIT_PARAM_NONE Use no parameter Subst. and Valid. *
* except B_RESULT *
* C_EXIT_PARAM_CLASS Use a type as parameter Subst. and Valid *
*----------------------------------------------------------------------*
* --> EXIT_TAB table with exit-name and exit-titles *
* structure: NAME(5), PARAM(1), TITEL(60)
*----------------------------------------------------------------------*
FORM GET_EXIT_TITLES TABLES ETAB.
DATA: BEGIN OF EXITS OCCURS 50,
NAME(5) TYPE C,
PARAM LIKE C_EXIT_PARAM_NONE,
TITLE(60) TYPE C,
END OF EXITS.
*!!!!!!!!!!!!!!!!!!!!!!!!!!!!!!!!!!!!!!!!!!!!!!!!!!!!!!!!!!!!!!!!!!!!!!!
* PLEASE DELETE THE FIRST '*' FORM THE BEGINING OF THE FOLLOWING LINES *
* IF THE ACCOUNTING MODULE IS INSTALLED IN YOUR SYSTEM: *
EXITS-NAME = 'U101'.
EXITS-PARAM = C_EXIT_PARAM_CLASS.
EXITS-TITLE = TEXT-100. "Posting date check
APPEND EXITS.
EXITS-NAME = 'U100'.
EXITS-PARAM = C_EXIT_PARAM_NONE. "Complete data used in exit.
EXITS-TITLE = TEXT-101. "Posting date check
APPEND EXITS.
* forms for SAP_EIS
EXITS-NAME = 'US001'. "single validation: only one
EXITS-PARAM = C_EXIT_PARAM_NONE. "data record used
EXITS-TITLE = TEXT-102. "Example EIS
APPEND EXITS.
EXITS-NAME = 'UM001'. "matrix validation:
EXITS-PARAM = C_EXIT_PARAM_CLASS. "complete data used in exit.
EXITS-TITLE = TEXT-103. "Example EIS
APPEND EXITS.
REFRESH ETAB.
LOOP AT EXITS.
ETAB = EXITS.
APPEND ETAB.
ENDLOOP.
ENDFORM.
*eject
*----------------------------------------------------------------------*
* FORM U100 *
*----------------------------------------------------------------------*
* Example of an exit for a boolean rule *
* This exit can be used in FI for callup points 1,2 or 3. *
*----------------------------------------------------------------------*
* <-- B_RESULT T = True F = False *
*----------------------------------------------------------------------*
FORM U100 USING B_RESULT.
*!!!!!!!!!!!!!!!!!!!!!!!!!!!!!!!!!!!!!!!!!!!!!!!!!!!!!!!!!!!!!!!!!!!!!!!
* PLEASE DELETE THE FIRST '*' FORM THE BEGINING OF THE FOLLOWING LINES *
* IF THE ACCOUNTING MODULE IS INSTALLED IN YOUR SYSTEM: *
*
* IF SY-DATUM = BKPF-BUDAT.
* B_RESULT = B_TRUE.
* ELSE.
* B_RESULT = B_FALSE.
* ENDIF.
ENDFORM.
*eject
*----------------------------------------------------------------------*
* FORM U101 *
*----------------------------------------------------------------------*
* Example of an exit using the complete data from one *
* multi-line rule. *
* This exit is intended for use from callup point 3, in FI. *
* *
* If account 400000 is used, then account 399999 must be posted *
* to in another posting line. *
*----------------------------------------------------------------------*
* --> BOOL_DATA The complete posting data. *
* <-- B_RESULT T = True F = False *
*----------------------------------------------------------------------*
*!!!!!!!!!!!!!!!!!!!!!!!!!!!!!!!!!!!!!!!!!!!!!!!!!!!!!!!!!!!!!!!!!!!!!!!
* PLEASE DELETE THE FIRST '*' FORM THE BEGINING OF THE FOLLOWING LINES *
* IF THE ACCOUNTING MODULE IS INSTALLED IN YOUR SYSTEM: *
*FORM u101 USING bool_data TYPE gb002_015
* CHANGING B_RESULT.
* DATA: B_ACC_400000_USED LIKE D_BOOL VALUE 'F'.
*
* B_RESULT = B_TRUE.
** Has account 400000 has been used?
* LOOP AT BOOL_DATA-BSEG INTO BSEG
* WHERE HKONT = '0000400000'.
* B_ACC_400000_USED = B_TRUE.
* EXIT.
* ENDLOOP.
*
** Check that account 400000 has been used.
* CHECK B_ACC_400000_USED = B_TRUE.
*
* B_RESULT = B_FALSE.
* LOOP AT BOOL_DATA-BSEG INTO BSEG
* WHERE HKONT = '0000399999'.
* B_RESULT = B_TRUE.
* EXIT.
* ENDLOOP.
*
*ENDFORM.
*eject
*----------------------------------------------------------------------*
* FORM US001
*----------------------------------------------------------------------*
* Example of an exit for a boolean rule in SAP-EIS
* for aspect 001 (single validation).
* one data record is transfered in structure CF<asspect>
*----------------------------------------------------------------------
* Attention: for any FORM one has to make an entry in the
* form GET_EXIT_TITLES at the beginning of this include
*----------------------------------------------------------------------*
* <-- B_RESULT T = True F = False *
*----------------------------------------------------------------------*
FORM US001 USING B_RESULT.
*TABLES CF001. "table name aspect 001
*
* IF ( CF001-SPART = '00000001' OR
* CF001-GEBIE = '00000001' ) AND
* CF001-ERLOS >= '1000000'.
*
** further checks ...
*
* B_RESULT = B_TRUE.
* ELSE.
*
** further checks ...
*
* B_RESULT = B_FALSE.
* ENDIF.
ENDFORM. "US001
*eject
*----------------------------------------------------------------------*
* FORM UM001
*----------------------------------------------------------------------*
* Example of an exit for a boolean rule in SAP-EIS
* for aspect 001 (matrix validation).
* Data is transfered in BOOL_DATA:
* BOOL_DATA-CF<aspect> is intern table of structure CF<asspect>
*----------------------------------------------------------------------
* Attention: for any FORM one has to make an entry in the
* form GET_EXIT_TITLES at the beginning of this include
*----------------------------------------------------------------------*
* <-- B_RESULT T = True F = False *
*----------------------------------------------------------------------*
FORM UM001 USING BOOL_DATA "TYPE GB002_<boolean class of aspect 001>
CHANGING B_RESULT.
*DATA: LC_CF001 LIKE CF001.
*DATA: LC_COUNT TYPE I.
* B_RESULT = B_TRUE.
* CLEAR LC_COUNT.
* process data records in BOOL_DATA
* LOOP AT BOOL_DATA-CF001 INTO LC_CF001.
* IF LC_CF001-SPART = '00000001'.
* ADD 1 TO LC_COUNT.
* IF LC_COUNT >= 2.
** division '00000001' may only occur once !
* B_RESULT = B_FALSE.
* EXIT.
* ENDIF.
* ENDIF.
*
** further checks ....
*
* ENDLOOP.
ENDFORM. "UM001
EXITS-NAME = 'U100'. EXITS-PARAM = C_EXIT_PARAM_NONE. "Complete data used in exit. EXITS-TITLE = TEXT-101. "Posting date check APPEND EXITS.
C_EXIT_PARAM_NONE:
C_EXIT_PARAM_FIELD:
C_EXIT_PARAM_CLASS
Creating your user exit


Unit Testing : This is done in Development System, Unit testing should be taken care of by the developer at the developer side by executing the test scripts which are provided by functional peoples to trace the errors like if its not meeting the reqs or any bugs is there.
Integration Testing : This is done in QA System, Integration testing is being done by functional folks after deliverable by the developer to test whether its working up to the point and after integrating this module with any other module, what are the errors. generating.
Regression Testing : The term “regression testing” can be applied two ways. First, when a code problem has been fixed, a regression test runs tests to verify that the defect is in fact fixed; “Imagine finding an error, fixing it, and repeating the test that exposed the problem in the first place. This is a regression test” (Kaner in Testing Computer Software). Second, regression testing is the counterpart of integration testing: when new code is added to existing code, regression testing verifies that the existing code continues to work correctly, whereas integration testing verifies that the new code works as expected. regression testing can describes the process of testing new code to verify that this new code hasn’t broken any old code.
User exit available
| EXIT_SAPMV45A_910 | IS-OIL/TAS: Exit Change-Flag Output determination |
| EXIT_SAPMV45A_911 | TAS – Customer exit after creation of calloff |
| EXIT_SAPMV45A_920 | User Exit: TAS data Incompletion Log on Doc.-header-level |
| EXIT_SAPMV45A_930 | Userexit to allow overdelivery in Quantity schedule |
| EXIT_SAPMV45A_001 | User Exit for Determining the Billing Plan Type |
| EXIT_SAPMV45A_002 | Preassignment of Sold-to Party in Sales Documents |
| EXIT_SAPMV45A_003 | Rev.Rec.: Copy Requirements An Header Level |
| EXIT_SAPMV45A_004 | Rev.Rec.: Field Modification Sales |
| EXIT_SAPMV45A_005 | Copyy Packing Proposal Into Outobund Delivery Orders |
Screen exit
| 4309 | 4.0: Subscreen: Header – Additional data A |
| 4312 | 4.0: Subscreen: Header – Additional data B |
| 8309 | Sales Document Header User Exit Header |
| 8310 | Sales Document Header User Exit Header |
| 8459 | Sales doc. Item User exit item (Additional data A) |
| 8460 | Sales Document Item User Exit Item (Additional data B) |
USEREXIT_AVAIL_CHECK_CREDIT
USEREXIT_CHECK_VBAK
USEREXIT_CHECK_VBAP
USEREXIT_CHECK_VBEP
USEREXIT_CHECK_VBKD
USEREXIT_CUST_MATERIAL_READ
USEREXIT_NEW_PRICING_VBAP
USEREXIT_NEW_PRICING_VBKD
USEREXIT_NUMBER_RANGE
USEREXIT_READ_DOCUMENT
USEREXIT_REFRESH_DOCUMENT
USEREXIT_SAVE_DOCUMENT
USEREXIT_SAVE_DOCUMENT_PREPARE
Tables related with sales order processing
VBAK Sales Document: Header Data
VBAP Sales Document: Item Data
VBEP Sales Document: Schedule Line Data
VBPA Sales Document: Partner
VBUK Sales Document: Header Status and Administrative Data
VBUP Sales Document: Header Status and Administrative Data
VBFA Sales Document Flow
VBKD Sales Document: Business Data
VBKFZ Cumulative Quantity Corrections
VBSN Change status relating to scheduling agreements
An Example Step by Step to Create Enhancement in User Exit SD
The user exits which you can use for modifications in sales document processing are listed below.
Additional header data is on screen SAPMV45A 0309, additional item data on screen SAPMV45A 0459. These screens contain the Include screens SAPMV45A 8309 or SAPMV45A 8459 as user exits.
Fields which are also to be included in the sales document for a specific installation should be included on the Include screens for maintaining. If an application-specific check module is needed for the fields, this can be included in the Include MV45AIZZ. The module is called up in the processing logic of the Include screens.
For field transports, you do not have to make changes or adjustments.
A new field, VBAK-ZZKUN, should be included in table VBAK.
If the check is defined via the Dictionary (fixed values or check table) the field must be included with the fullscreen editor in the Include screen SAPMV45A 8309. In this case, no change has to be made to the processing logic.